A few years ago we decided to install a walking path from the driveway to the front door, and we considered lots of hardscape options. My very favorite is flagstone, but it was expensive, and we were intimidated by the irregular edges of the stones. My husband is very handsome, so he’s not especially handy. And neither am I.
We settled on a red-brick path for a few reasons. First, it seemed fairly straightforward as far as pattern options and getting a nice, even edge. Second, my grandparents had a path of clay bricks in their back yard, and I just loved the thing as a kid. And third, we have a little bit of red brick on our house, way up high on the chimneys.

At my dad’s suggestion we rented a sod cutter, and I would recommend that too. It cost $35, left really nice finished edges, and adjusted easily to the depth we wanted (which was the brick height). However, because we are not handy, we had a heck of a time getting the thing working. I highly recommend watching an online tutorial for “how to use a sod cutter” before and after renting one. Once we figured it out, the work was done in five minutes. But it took us 90 minutes to look it up on YouTube.
Start to finish the project took about five hours, perfect for a Saturday.
Here are the steps we took:

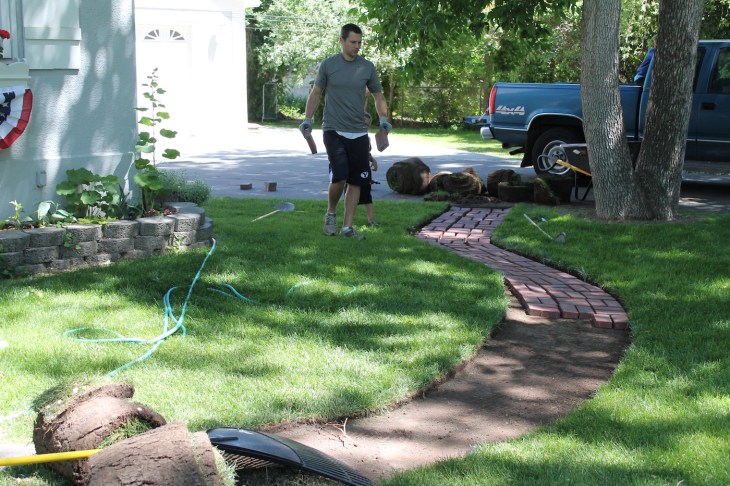
Figure out exactly the shape and direction of the path. To mark ours we used extension cords, then spray-painted along the cords so we’d know where to cut. The extension cords added another bonus: After we got the shape of the path just how we wanted it, we needed to figure out how many bricks to buy. So we stretched that curved length of cord straight and measured its length. My husband figured out how many bricks were needed using math I can’t explain, so get a math-inclined person to help you with this. We ended up three bricks shy — pretty close to right on, I’d say.
We used the width of the bricks plus the space we wanted between them to figure out the right width for the path—no brick cutting required.
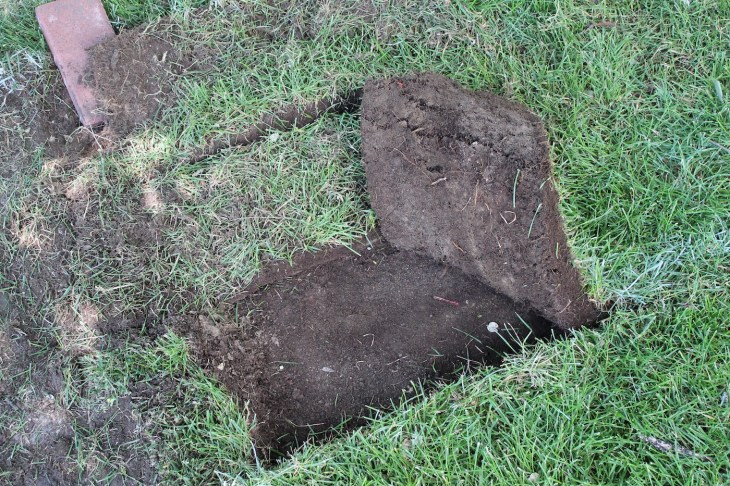
After determining brick height, remove sod with sod cutter at the correct depth. If you live in newer construction you’ll want to compact the dirt below before adding bricks to prevent settling later; because our house is old, we eliminated this step.
Add a secret something. My son helped me write a little note with info about our family and when we lived in our house, then we buried the jar under the path. We hope this will be a treasure for someone excavating way down the road.

This, of course, was my favorite step. 🙂
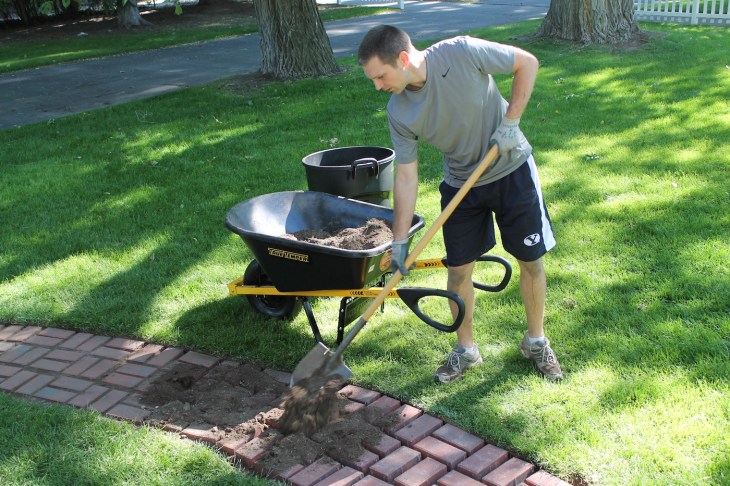
Arrange bricks. Dump dirt over path and sweep it into the gaps between bricks. I opted to use a house broom for this because a heavy-duty push broom might disrupt the brick layout. Soak with water so dirt can settle, then add more dirt as needed.
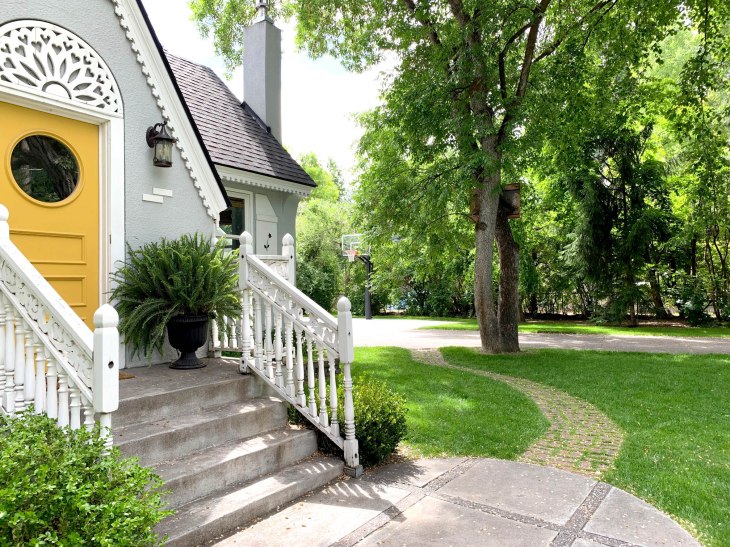
We added grass seed to the cracks, and the grass is growing there now, making the path look more incorporated into the yard. Total cost for bricks and rental: $155.
You can do this project! It’s easy and not too spendy. If you have questions, please let me know in the comments. •

Marking your path first is an excellent idea. I love that your son burried a note! How cute! The path looks great!
LikeLike
Not surprised at all you and Johnny buried a note. That’s super sweet. I love your brick path, it looks really nice. I thought so last time I was at your house but forgot to say something.
LikeLike
Thank you for the step by step tutorial (I didn’t even know sod cutters were rentable to the layman!). It looks especially fantastic with the grass now growing in between!
LikeLike